Hi friends,
A couple of years ago, I read an online article out about a fun nature-sharing idea. It's called a Nature Exchange. At the time, there was a woman who was a mediator of sorts, who would take the names and addresses of 2 families that lived far apart from one another (maybe even in another country), exchange the info, and then the 2 families would gather nature items from their area, and mail them to each other. It sounded like a great way to learn about nature in other parts of the country....or world.
I sent the mediator our info. Long story short, we sent a family a wonderful box of nature goodies, and got nothing in return...no nature treasures, not even a thank-you note. My children were so disappointed.
So I gave up on that idea for awhile.
But being the nature-loving children that they are, they brought it up a month or so ago, asking if we could try another family.
I decided that we would not use a mediator again since I have so many wonderful blogging friends to ask.
I made a mental list of the ones that I thought would be interested. There was one friend who is so busy, she can't possibly participate this time around. I completely understand.
So then I thought of my dear AO friend, Silvia, who although she doesn't live in another country, she lives far enough away that our climates and native animal/plant species are vastly different.
I mentioned her to my children and they were very eager to learn all about the nature in Silvia's state.
So I emailed her to ask. And she said, "Yes!"
The gathering frenzy commenced. The children worked really hard to find things they thought Silvia's family would enjoy. If I had $1.00 for every time one of the children asked, "Can we send this in the box?", I would be a very rich woman. :)
When the frenzy had subsided and we had enough to fill a box, we wrapped everything in bubble wrap,
labeled them, and carefully packed them in a box. We also included a short letter introducing our family and telling a little bit about what it's like to live in our area.
We securely taped up the box and mailed it.
We hope they have as much fun opening it as we did sending it. :)
(And btw, we had so much fun and learned so much about nature in Silvia's area, we're planning on doing it again later this year!)
Now, for the 2nd best part of this whole thing...would you like to know what Silvia's family sent us?
I thought you'd never ask! ;)
Take a look at my children (and oldest granddaughter) tearing into the box...
Here are the treasures that were in the box...
They sent us beautiful shells...
Pecans (we LOVE pecans!)...
A stick with smooth bark and a wonderful smell...
Prickly Sycamore pods (we love these, because we have only the smooth pods!)...
Lovely duck feathers...
A huge mushroom...
They also sent us a sweet treat - delicious figs! Yummy! :)
They included a pamphlet listing mammal, insect, and plants species in their area. My children have learned so much from reading this! It has been so informative.
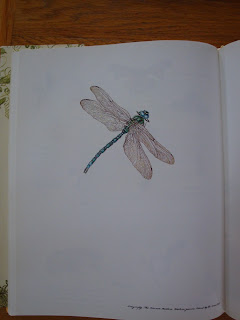
Last, but certainly not least, they sent us this lovely nature book.
It has the most beautiful illustrations, don't you think?
Now, where in the world should we keep our nature treasures, we wondered.
We knew it would have to be a very special place.
Well, on a shelf in our school room is where they found their home.
What a treasure trove of goodies!!!
And every time we look at them, we'll think of our dear friends from Texas. :)
And every time we look at them, we'll think of our dear friends from Texas. :)
(We also received beautiful bookmarks, but my children whisked them away so fast, I hardly caught a glimpse of them. At the moment, they are safely tucked away in some of my children's favorites books. :) )
This is one of the most fun-filled, learning activities that our family has ever participated in. We truly loved every moment of it!!
This is one of the most fun-filled, learning activities that our family has ever participated in. We truly loved every moment of it!!
Now...want to know what we sent Silvia and her family??
Head over to her blog and see for yourself!
What about you, friends? Is there a family you'd like to have a nature exchange with? It's a wonderful experience. You'll want to do it again and again. Trust me.
What about you, friends? Is there a family you'd like to have a nature exchange with? It's a wonderful experience. You'll want to do it again and again. Trust me.
"Many, O Lord my God, are Your wonderful works
Which You have done.." ~ Psalm 40:5
Have a wonderful day, everyone!


